The Containment Bay S1T7 Unreal Raid is now available in Final Fantasy XIV. Here, you will have a chance to face off against the fearsome foe Sephirot, working together alongside a small team to defeat them. There are multiple mechanics to work through, many of which differ from the standard raid you already completed at level 60. This guide covers how to complete Containment Bay S1T7 on Unreal difficulty in Final Fantasy XIV, so you can defeat Sephirot.
How to beat Sephirot
How to unlock Containment Bay S1T7 (Unreal)
Before you can start this raid, you will need to unlock it. You can do this after reaching the Heavensward expansion, completing it, and reaching the Gods of Eld quest. You can find this quest in The Pillars by speaking with Torsefers, which will unlock the standard Containment Bay S1T7 Raid. You will need to complete this once to access the Unreal version.
Related: All Pandæmonium Abyssos Savage weapons in Final Fantasy XIV
First phase
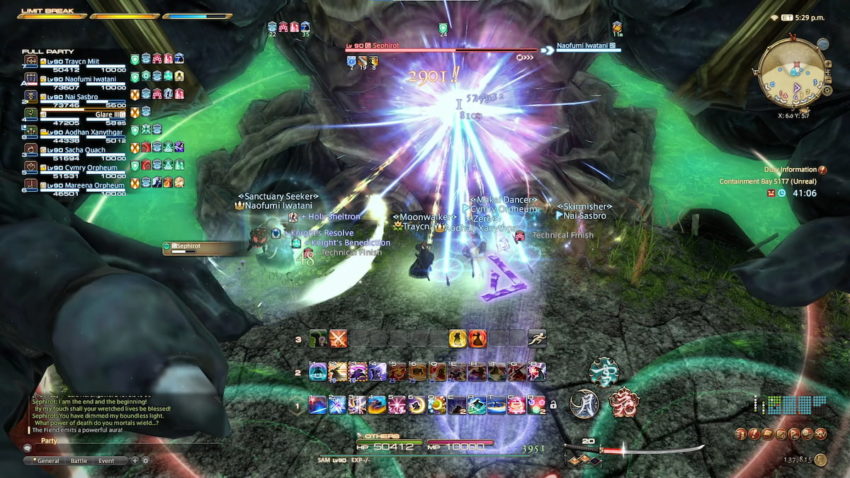
At the beginning of the fight, your Main Tank for the battle will want to pull Sephirot to the opposite side, facing away from the party. The boss will unleash focused attacks that do a cleaving area of effect. You want to make sure the tank is facing away from the party. Throughout these attacks, Sephirot will unleash multiple party-wide attacks that will damage everyone, forcing the party’s healers to focus on sending out area heals and damage mitigation as much as possible. If any other players can assist with this, it is highly advised. In addition, these attacks can be back-to-back, complicating them.
Once these attacks have ceased, the next attack Sephirot unleashes places green orbs on the ground. One will be in the middle of the arena, and the next three will make a T-shape on the floor. Your party will want to go where there are no orbs, with the damage dealers stacking up, and the second tank and healers go together. This is because, after these attacks, a damage stack will be placed on one damage dealer and one on a healer. You want to spread these out to prevent everyone, as it also causes a Physical Vulnerability debuff. You don’t want this to happen to your main tank.

After this phase, the main tank will take Sephirot back to the middle and go through the same pattern. Now, everyone is waiting to see another green orb appear in the arena. When it does, everyone will want to stack right on the edge of the boss’ damage, waiting for the green orb to reach them.
While this is happening, several players will receive a Purple or Green AOE attack on top of them. When this happens, burst behind the boss and spread out and away from each other, with the one with the Purple stack going to the back wall. The boss will remain facing the Green orb and do a massive attack in this direction. After this, reset and continue this rotation at least three more times.

Once you reach a certain point, Sephirot will disperse to one side of the arena, and multiple enemies will appear. One is named Binah, and the other is named Cochma. The main tank will want to focus on the Cochma, while the rest of the group focuses on the Binah. The Cochma will do some heavy attacks while landing Magic vulnerabilities stacks, whereas the Binah do magical damage. Your group will want to keep Binah away from the main tank while the Cochma is out. Any time you take out these enemies, a party-wide attack damages everyone. We recommend spreading these attacks and giving your healers time to heal and regain spells. You will need to defeat two Cochma and 12 Binah.

Second Phase
Before the second phase is about to begin, Sephirot is going to destroy the main floor. We recommend having everyone stack at the center point, close to the north side, and then apply damage mitigation for a party-wide attack that will do some heavy damage. When this happens, the stage will reappear beneath you, and a yellow flash will appear on the screen. Immediately move from your position when this happens, as spikes will drive up from your current position. You can now target Sephirot and begin damaging them.

Shortly after this happens, everyone at the party will have an orange or green debuff. The orange debuff is Force Against Might, lowering your physical defense, and the green debuff is Force Against Magic, lowering your magical defense. Sephirot will place their hands out, one will be orange, and one will be green. You will want to stand on the side with the orb of the same color as your debuff. The ones with the orange debuff will want to be closer to the center of the stage, whereas the ones with the green buff will want closer to Sephirot.

After the orbs explode, two circles will appear, making them look like large towers, which is doing heavy damage at this location. The ones with the orange debuff will want to stand on these towers. When they erupt, they will do no damage to them, but they will now receive tethers connecting them to Sephirot. The ones with the green debuff will want to stand in front of Sephirot to steal those tethers.
When the tethers go off, they will do no damage to the ones with the green debuff. While this is happening, the ones with the orange debuff will want to go to the far south side, and the ones with the green debuff will want to be under Sephirot, as multiple green orbs will grow in the middle of the arena. When the green orbs go off, the orange rebuffed party members want to rush to the center and absorb the towers that are about to explode again.
Next, a healer and a damage party member will receive an Earthshaker. This means they will want to go to the arena’s south side, opposite each other. However, your screen will flash yellow before these go off, so expect to dodge another spike similar to the first part of the second phase.
After this attack, everyone will receive attack spreads, forcing everyone to spread out and away from each other. However, shortly after these attacks, two pillars will appear again. Your group’s tanks will want to pick one to go into, apply damage mitigation, and take these heavy hits for the party.
Once you’ve made it through these attacks, the next series will knock your party back multiple times, and positioning is highly critical. A blue circle will appear in front of Sephirot, and everyone will want to stack at this location. Wait here, and then disperse to the southeast part of the blue circle when a yellow flash appears, knocking you back to the southeast part of the arena.
Next, avoid the blue circle, but get to the center of the arena, on the outside of the glowing green orb growing on the southwest side, and when the knockback happens, you will go to the far east side of the arena. The next circle to appear will be close to your current position on the east side. You want to go outside, on the southwest part of it, and when it goes off, you’ll land on the southwest portion of the arena. Upon completing these attacks, your party will deal with another part of Earthshakers, but they have the same mechanics.
Now, you want to get close to Sephirot on his side of the arena and wait for him to knock you back to the south side. After he does, you and your party must deal with multiple enemies. There will be several Binahs and a Storm of Words close to your party. You will want to focus on the Storm of Words and have a tank focus on the Binahs. While this happens, expect multiple attacks from Sephirot, such as the pillars and orbs. You will want to coordinate with your healers to ensure they’re prepared for all this damage. After the Storm of Words has been defeated, focus on the Binahs.
Upon defeating the Storm of Words, it will leave behind a green aura. Everyone will want to stack on it, and Sephirot will do a small knockback. However, the green aura will send everyone into the air, avoiding a sweep attack by Sephirot, potentially throwing everyone off the level. This process will repeat itself until your defeat Sephirot.
If you and your party cannot defeat Sephirot before the enrage mechanic, his arms will go down to one side of the arena and sweep everyone off to the side. No green aura in the south of the arena will send everyone into the air.


Published: Sep 5, 2022 02:30 pm