In Mission 1: The Maria Walkthrough of Spider-Man PS4 The Heist DLC, you will investigate a museum where you will need to solve a fingerprint puzzle to unlock a security booth and fight an army of goons to stop the robbery.
The City That Never Sleeps DLC package for Spider-Man PS4 comes with a three DLC content: The Heist (available now), Turf Wars (scheduled to launch in November 2018), and Silver Lining (scheduled to launch in December 2018).
In the first chapter The Maria of The Heist DLC, you will have to stop a robbery at a museum. You will be dealing with an army of goons here, you will also have to solve a puzzle to unlock a locked Security room by locating the fingerprints of a guard.
The Maria Walkthrough
This chapter has three phase of fights where you will face a different number of goons. Each time stronger and armed goons will appear.
Investigate The Museum
After the cutscene, you will have to face a group of goons who are trying to break-in. There are two approaches, first, you can ambush or you can go stealth. If you plan to ambush then take down the enemies with guns first. You can spot the armed ones by looking for a straight white line, a kind of bullet projection when they shoot.
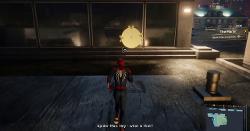
After defeating the enemies go to the right side of the door which the goons were trying to break in. You will see the claws mark on the wall on the side of the building. Go on the roof and investigate the hole on the roof. To find who break you have to investigate the area. First, check the security booth on the left side of the main door. Next, to unlock the security booth you will have to locate three partial prints.
Three Partial Prints Location Puzzle:
The prints are located on three locations inside the building, you will find one on a walkie-talkie, one on a torch and one in a coffee cup.
Partial Print 1 Location:
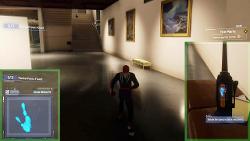
There is a painting room on the extreme right of the building. From the main door, take the stairs on the sides of the front desk. Go up and go extreme right and you will reach a room with paintings. Go inside and look on a small table kept near on the wall. Pick the walkie-talkie and rotate it to locate the handprint.
Partial Print 2 Location:
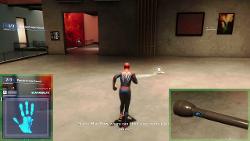
For the second one exit the room and return back to the center area. Look for a torch and a notepad on the floor towards the right. Pick the torch and rotate it, look on the torch button to get the second partial print.
Partial Print 3 Location:
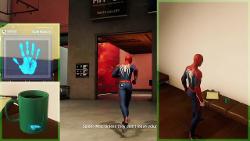
For the third and final print take the entrance in the front-left where you find the torch. Look for MM CA sign over the entrance. Turn left and on you will reach another room with some paintings. Look on a small couch on the right wall. You will find a coffee cup which has the final print.
After collecting all three prints go to the security room and you will play the final piece of a puzzle to unlock the booth. The solution is in the above image. You will see all the guards are knocked out by someone and locked in the security room. Look on the console on the left side to get a clue.
Halt Robbery Attempt
Check the painting which is placed in the center of the upper floor. In the cutscene, you will see a few bunches of thugs will crash in and try to break the security glass to get the painting. You have to play in stealth now, there are vents on the top side that will help you to move around the rooms. After a while the thugs will try to run away with whatever they can, you have to stop the robbery. Look for the red down arrow and target those thugs first.
Fight the “Big Guns”
Return to the painting and there will be a cutscene where you will see the Black Cat. Just after that, an army of goons will enter the museum. Stop them all and watch out for the missile launcher. Focus on the armed goons first. The fight will be long due to the higher number of enemies. Taking down the armed one will help you to reduce the high impact on your health, one rocket can drain a high amount of health. Return to the painting area and you will see Black Cat steals it.
This completes the first chapter of Spider-Man PS4 The Heist DLC, you can read our walkthrough on the next one by clicking on the link – The Trouble with Arson. For more similar guides and tips on the game do check our Spider-Man 4 PS4 Wiki guide.





Published: Oct 24, 2018 06:32 am