Since the release of Destiny 2: The Witch Queen, players have enjoyed the challenging raids and repeatable content. The fandom, in particular, has stepped up in giving their fellow guardians assistance in some of the more challenging puzzles in the game. Many have set solutions to various challenges over the years, and Bungie has done a great job in terms of its raid design.
The Vow of the Disciple raid is one of the cooler raids when it comes to its depth. One of its finest puzzles has to do with the many symbols that are used as gateways to various secrets and extra content. This guide will shed light on all the symbols and their meaning in Destiny 2.
Related: 5 best Exotic Hand Cannons in Destiny 2
What Are the Symbols in Vow of the Disciple
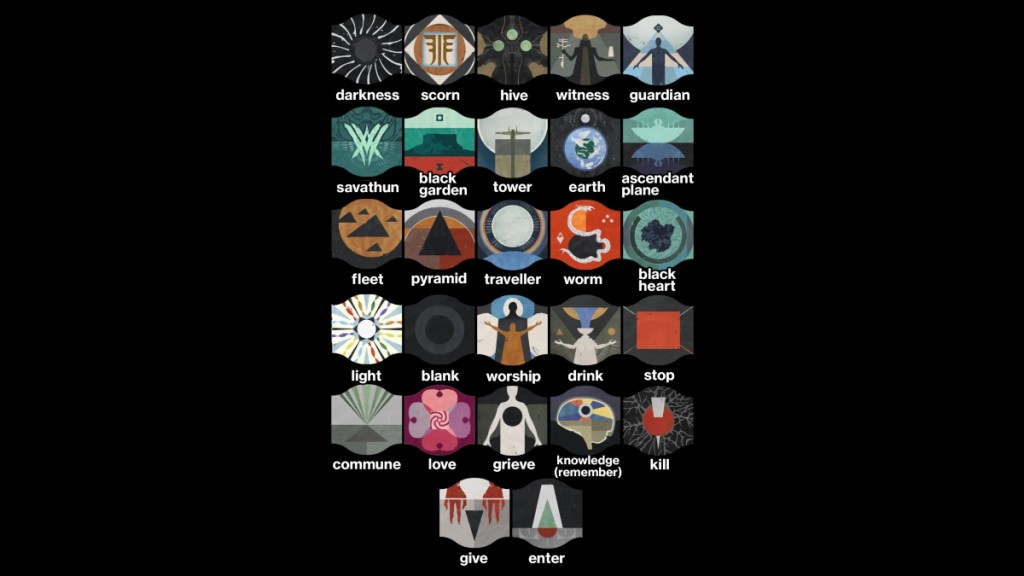
Each symbol has a unique feature that comes along with activating it. The names don’t appear initially, but if you move close enough, the symbol’s names will appear. Memorizing the names is important for a raid group, as coordinating with your teammates is crucial to activating the correct symbols. You can use a labeled image like the one the Reddit community put up to learn what each one is called.
Related: Destiny 2: How to Get The Wicked Implement
How the Symbols Work for Activating the Secret Puzzle in Vow of the Disciple
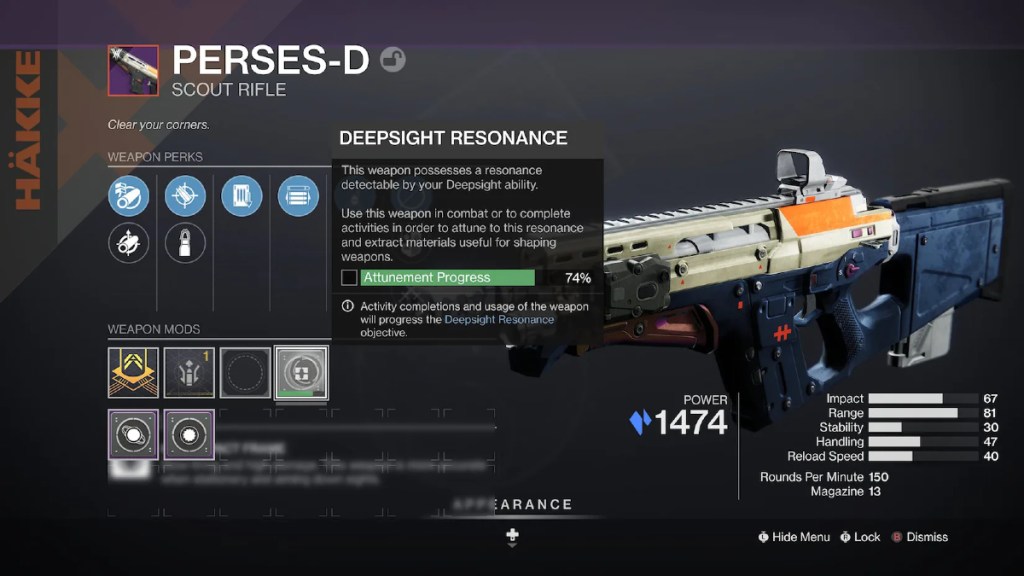
The symbols can be used to activate a secret puzzle that rewards players with a chest and a weapon with Deepsight Resonance. These are called red weapons, which give the ability to see invisible platforms, similar to Savathûn’s Throne World. You should keep in mind that this area is farmable if you need the weapons.
To solve the puzzle, players need to find a totem that has three of the symbols on it. The symbols are randomized, so be prepared to call them out once you find them. Next, locate each room with the corresponding symbol, then shoot them to switch them on. Afterward, just kill the final boss to get the rewards.
Here’s how to find each room:
- Pyramid – Jump into the hole from the totem, then turn around and shoot the shard.
- Give – In the hallway with the floating square frames, turn left and find the shard on the wall. Follow this shard to reach the room.
- Darkness – At the first encounter, shoot the shard in-between the Sphinx’s paws.
- Traveller – After the first encounter, enter the collection room, then jump on the nearby statues to reach the upper ledge on the far end of the room. The shard is behind one of the statues.
- Worship – After completing the second encounter, the shard will appear on the left side of the room, it will open another room on the opposite side.
- Light – After the second encounter, proceed to the jumping puzzle room, then locate the illuminated statue on the left side of the room. Shoot the shard above it.
- Stop – At the end of the jumping puzzle room, enter a small crack to reach the next room, the shard is directly across the entrance.
- Guardian – After the third encounter, head left towards the staircases. At the top of the second staircase, jump across to the left platform behind the giant pillars. Then, look behind the pillar to find the shard. To get to it, go back down the second set of stairs and jump on the giant pillars until you reach it.
- Kill – In the room before the final boss encounter, head to the platforms at the very top. Opposite the boss area is the shard sitting high up on the wall.





Published: Aug 7, 2023 4:17 AM UTC