Metal Gear Survive Chapter 2 and Chapter 3: Secure The Memory Board Walkthrough – you need to locate 4 Memory Boards (Locations) that will help you to work with Wormhole Transporters in Chapter 4.
After completing the Prologue Walkthrough, you move forward to Chapter 2 and Chapter 3 walkthrough. The main objective is to Secure the memory boards. During the start, you will be learning more about the base, understanding its entire structure and slowly unlocking new things. You will unlock new workbench, skills section and also an air tank that will lead you to walk in the dust. Next, in Chapter 3 you will have to Secure Memory Boards that will help you to work with Worm Hole Transporters in Chapter 4
Secure The Memory Board Walkthrough
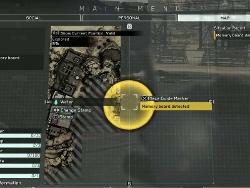
At the base, AI Virgil will tell you about a memory board, and you will get the location of the board on your map. You have to find it to gather info on research data. So first consume enough food to restore your life and stamina. You can see your Hunger and Thirst meter in the Food & Drink section of Inventory. Try to keep it max, so that you won’t die while fighting the Wanderers. To begin your mission interact with the AI and there will be a short dialogue. Before going towards the location try to build some Fence from the Defense Unit section from Gadget Workbench > Craft. You will need iron for this, build the fences and add them in your load-out. Also, you can repair your current weapon through the same bench. Things you can get is iron from the debris around, there are cylinders, metal doors, etc you can break with a spear. There are cabinets that can give you iron and clay. You can also get Kuban Energy by breaking the purple crystals that are scattered around the location and in corners.
Secure The Memory Board 1 Location Walkthrough
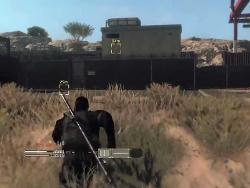
You will also see the Dust for the first time, it is a toxic environment where you can survive only with an Air Tank for a specific period of time. Once you are ready, reach the marker, you will reach a facility with a lot of Wanderers inside. Stand near the gate and kill them with a spear, they won’t be able to come out. Kill them first and then look for the huge pipe that is coming out of the area. Just follow the pipe by running on the left-end side of this facility, you will find few more crystals. Break them to get Kuban Energy, follow the pipe, you will reach towards a broken metal wall. There are horde Wanderers in it, stay at a distance and place a fence. But don’t block the path, place it a bit far from the broken wall, and let them come near you. You can then use the speaker to kill them all.
The second thing you can do is go into stealth mode, this can take the time you can go slowly around the corners and kill the Wanderer’s from the back. Follow the marker and you will reach system, interact to connect your iDroid to it. Once done, you will have to return to the base. But remember not to draw the Wanderer’s towards your location, so if you are followed kill them first. There are many items you can gather in the area, like Gunny Sack, Wood, Iron, Clay, etc. before reaching the camp. Interact with the AI to complete the objective. After this mission, you will get the recipe for Sandbag Foothold and Construction Terminal will be available for usage. AI Virgil will update more location of Memory Boards in the Situation Report. Before finding more of these boards you will have to craft Wormhole Collector from the Construction Terminal. From the Gear Bench, you can also construct Wormhole Extraction Device, this is a fast travel point that you can use for instantly transporting from base to other locations. Go to the Survival Equipment Section. Below are the requirements to craft a Wormhole extraction device.
- 1x Iron
- 1x Wire
- x1 Adhesive
- 50 Kuban Energy (KUB)
Through Gadgets Workbench, under other Units, you can craft a Sandbag foothold that will help you to block enemies in your path and it has a bit higher durability than fences. Below are the items required to craft it.
- 14x Clay
- 4x Wood
- 4x Nails
- 6x Gunny Sack
- 50 Kuban Energy (KUB)
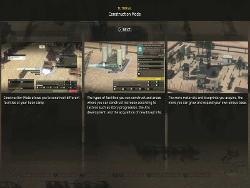
As the Construction Terminal is active you can start building your base, you can construct various facilities here, for this you will have to acquire two things materials and blueprints. Through Facilities list you can select the structure you want to build and then pick a location. There are barriers also, you can add a different type of barriers at the edges to lock the base and protect it from enemies attack. Without materials and Kuban energy, you cannot construct. So you have to keep on collecting them. So now the list of facilities you can construct from the Building section is:
- Campfire: 5x Iron, 5 Wood & 50 KUB.
- Weapons Workbench: 5x Wood, 5 Nail & 50 KUB.
- Gadgets Workbench: 5x Wood, 5 Nail & 50 KUB.
- Gear Workbench: 5x Wood, 5 Nail & 50 KUB.
- Medical Workstation: 5x Woods, 5x Nails & 50 KUB
Building a Medical Workstation is best at the start, you can get a lot of boosts that will help you in the game. Like Taping Kit that cost 1x Adhesive and 1x Rag and it can cure Sprain. There are bandages that can be crafted from 3x Alcohol and 2 Rag + 2 KUB, can be used for curing Laceration. You can also craft Energy Drink that will cure Fatigued, Poultice for curing Bruised, there is Antibacterial Drug also that cure infected, Intestinal Medicine, Antidote, Serum, etc. Each of these medicines will help you to survive longer in the game so do learn their properties well. And keep a few of them in your inventory.
Secure The Memory Board 2 Location Walkthrough
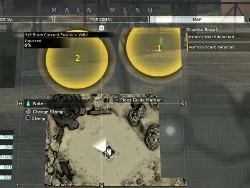
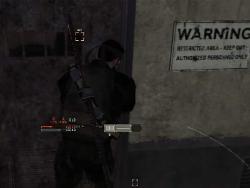
After reaching the base AI Virgil will give you locations of two more boards. Go to the Gear Bench Workbench once to repair your weapons. And then you can move ahead with your object. You will see two big massive yellow areas. Marking the right as Memory Board 2 and the left one as Memory Board 3, start walking towards one on the right one i.e. Memory Board 1. Do keep an eye on metal cabinets around it will help you to get a lot of items in a single try. Once you reach near the board you can also hunt down a few animals if you want. You reach a facility that you had seen before, try not to make any sound at the start. Go towards the door that has a warning sign and unlocks it. The Threat Ring will guide you to Wanderer’s location, try to stay quiet, the place is infested with enemies. In case you are the spot, find a place and build a fence, and stay behind it. Use the cover to kill all the approaching enemies.
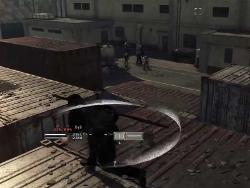
Gather the Kuban energy from the dead Wanderer’s and quietly move towards the board location. Another safe way is to climb up on the crates and move quietly. Take your time, and try killing the Wanderer’s in stealth mode. You can run from extreme right end, unlock the locked doors and reach near the board. You will have to climb up over the building on your front right to reach the board. Once again you will have to unlock the door to reach the board. Return to the base to sync your iDroid device and refill your Health. This will unlock the Skill Trainer section of the game. By spending Skill Points you can unlock new skills as you level up. You can enter the Skill Trainer and based on your class Survivor you can upgrade your skills. Also visit the Weapon s Workbench, if you had gathered enough item you will be able to craft a Rusty Machete.
Secure The Memory Board 3 Location Walkthrough
Before moving towards the third visit the Gadget Workbench and craft Sandbag Foothold and Lure and add them to your current inventory. This will help you to attract a horde of Wanderer’s and then attack them with each. So this time you can carry a fence, sandbag, and lure. Through the same workbench, you can go in Convert Material section and convert your existing items to required one. Like Nails, Screws, Steel, Gears, etc can be converted to iron. Ceramic can be converted to Clay, each conversion will require a certain amount of KUB. Have look at AI Virgil’s Daily Order, if you had completed a few of them then collect your rewards. After you are done filling up your inventory and charging up head to the next Memory Board location. You will reach a huge room, the board is inside and a body of the dead soldier inside. Just return to the base, there won’t be many challenges you will face here. Return to the base camp. After you sync with AI, you can now craft an Air Tank that will help you to move inside the Dust. Go to the Gear Workbench, and craft the Air Tank.
Secure The Memory Board 4 Location Walkthrough
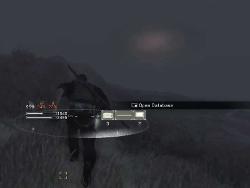
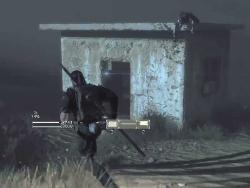
Another memory board location will appear on the map, head towards the huge yellow circle. Near the map, you can hunt Jackal, for meat. You will have to enter the Dust this time, go near and look for light based on the map location, go slow as Stamina consumption is high in Dust. Avoid a direct interaction with Wanderer’s kill them in stealth mode, and use gather Kuban Energy that will help you ahead. You will reach the small building, there are wanderers all around, so you have to quietly. In case you are surrounded by a horde of wanderers, best is to go inside the house and create a fence in front of the door. Stay there and keep killing them. There is no other better safe spot. You will also find Containers in one of the rooms on the left back side of the building. These containers are filled with a lot of resources and valuable items. Opening them produce sound, so the first thing to do is clear any enemy around and then open it. For the final objective, take the memory board from the main building and return to the base camp. There will be another container inside.
This completes Chapter 2 and Chapter 3 where you have to gather around 4 Memory boards, also you unlock a lot of new things in the game. You can read our walkthrough of the Chapter 4 Wormhole Transporter or you can also read our Metal Gear Survive Wiki guide for more update on the game.




Published: Feb 22, 2018 01:55 pm