Marvel’s Avengers mission chains are quite interesting, however, some of them are pretty hard to get well acquainted with. That is due to the fact the game hardly explains how you can unlock some mission chains, and you are on your own if you want to unlock a specific mission chain.
The Vault Onboarding Mission Chain is one of the few complex missions in the game since it requires a number of steps to complete. You also need to complete the Vault Onboarding Mission chain to complete the Reigning Supreme mission chain. Here is how to unlock and complete the Vault Onboarding Mission Chain.
Step 1
First of all, you need to unlock the Vault Onboarding Mission chain. To do so, you need to first find SHIELD Caches. Inside the SHIELD caches, there are strongboxes that are marked, and you will get Vault coordinates on opening them. You can check out our guide here to know how to find SHIELD caches. Once you get the Vault coordinates, a Vault mission will show up on the War Table.
Step 2
The second step involves completing a Vault mission. Just head on to the War Table and select a Vault mission. Complete the objectives to finish this step.
Step 3
The final step is to complete an Elite Vault mission, the Forest Vault. This Vault mission doesn’t require Vault coordinates and should unlock as soon as you complete the first two steps. Once the mission begins, you need to keep going forward until the radar pops up on the top left part of the screen. Follow it to reach a place where the distance shows zero on the radar.
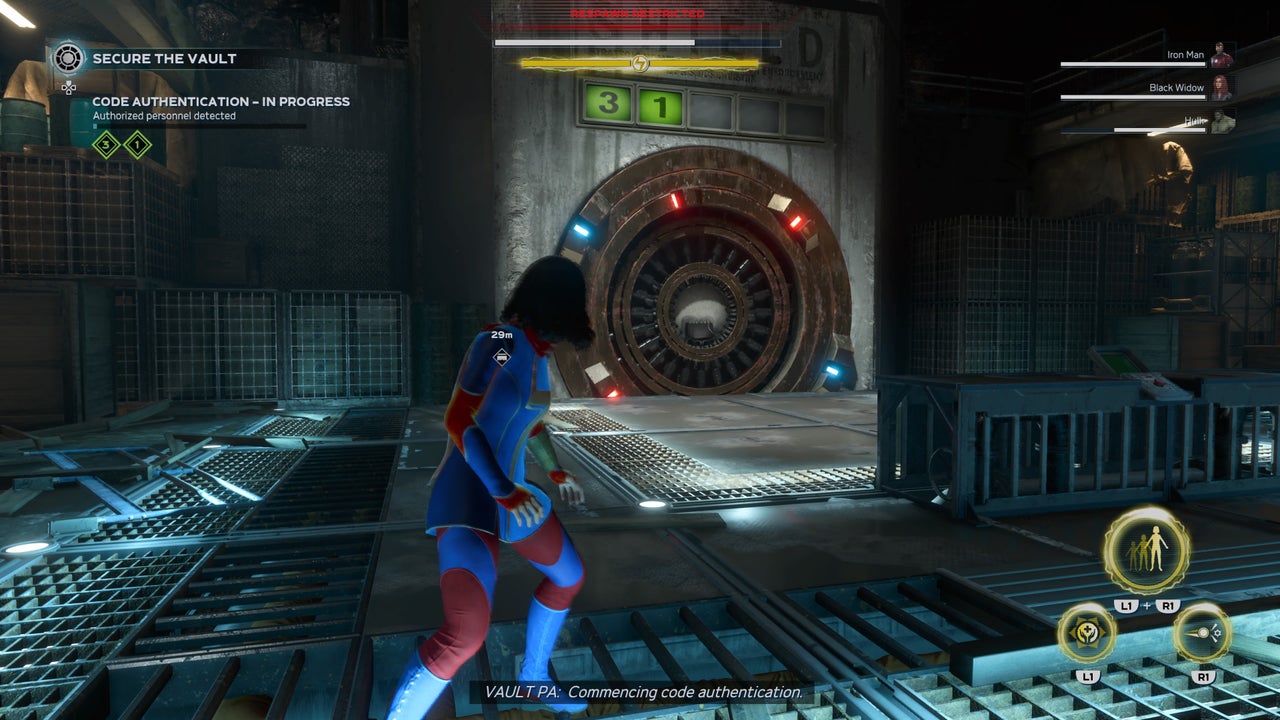
Interact with the white dot on the screen when the radar shows zero and the bunker will open. Once you are inside the bunker, you will see the Vault door which you need to unlock. There will be an objective marker which you need to interact with to start the unlock process. A timer will start and a number will pop up on the top left part of the screen. Stand on the terminal with the highlighted number to activate it. Once that’s done, the second number will be highlighted and you need to stand on the respective terminal and wait for Jarvis to activate it.
Once you’ve activated the two numbers, head back to the Vault. Stand on the square in front of the Vault and defeat all enemies until the blue bar on the top left is filled. Once that’s done, you need to repeat the entire process two more times, each time with an additional terminal. Repeating the process thrice will unlock the Vault door. Go inside and grab all the loot. When you’re done, interact with the green terminal to finish the mission.
Once you have completed all the three steps, you will have successfully completed the Vault mission chain. This will also complete one of the objectives of The Days Ahead mission which you need to complete for the Reigning Supreme mission chain.


Published: Sep 14, 2020 01:48 pm