In Sheltered 2, you’ll be fighting a lot of things. Enemy factions and strangers present a danger, and sometimes your survivors are their own worst enemy, but it’s hunger and thirst that you’ll be battling with daily. One of the easiest ways to acquire more food for your shelter is growing it in surface planters. This guide covers how you craft and use these to harvest food without even thinking about it.
How to craft surface planters

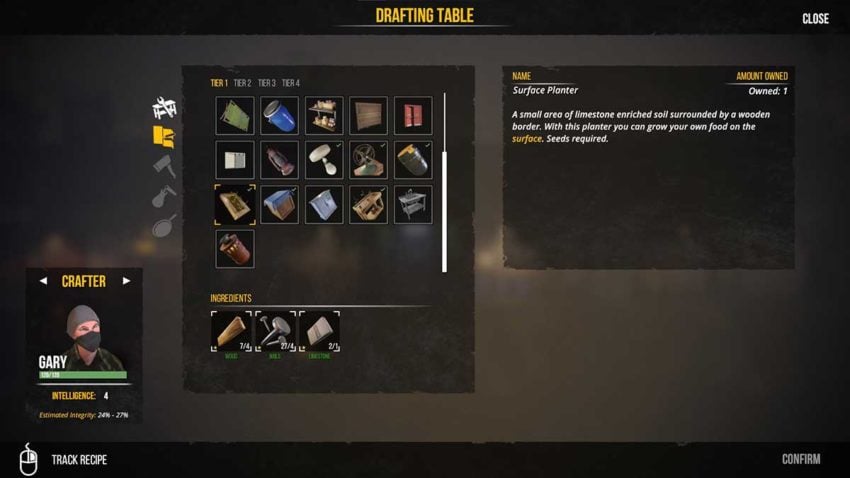
To craft a surface planter, you need to open the build menu on your workbench or research desk and select it. You’ll need one Limestone, four Nails, and four Wood. These are resources that you’ll acquire pretty regularly from expeditions. You can also make most of them by recycling other items you come across in the world and bringing them back to your shelter.
Once you’ve crafted the surface planter, you need to place it on the surface. It will take you to a screen that shows the area above your shelter. You can set the surface planter wherever you want, but we recommend placing it close to your other ones so that it’s easy for your survivors to manage farming in the future.
How to use a surface planter

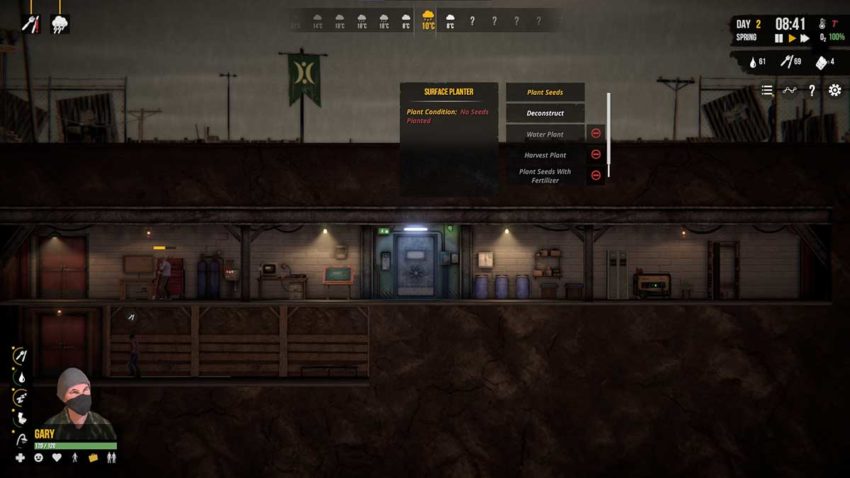
Once the surface planter has been placed, you need to click on it and select the seeds you’d like to plant. You’ll start the game with a pack, but each harvest rewards you with a few as you go on. To find more, you need to trade with NPCs in the game’s world or scavenge them on expeditions.
With the seeds in the planter, you now need to wait for the crop to grow. You’ll be able to see the growth rate and some other stats by hovering over the surface planter. This tells you if the seeds need watering, if the temperature is too cold, and alters you to any other issues that might arise. Keep an eye on it to ensure that your crops don’t dry up and die.
When the plants are ready to harvest, click on the planter and send a survivor up to collect everything that’s grown. This is when you’ll get a glut of vegetables and seeds to use in the future. The food can be eaten out of your pantry, and you’ll be able to plant the seeds in the planter as soon as you’ve harvested them. While you can upgrade your shelter to be more convenient, these items can save the lives of your survivors.


Published: Sep 21, 2021 02:40 am