Disney Dreamlight Valley is a game where you can create anything that your heart desires. From the start of the game, you can customize your character to look however you want. After that, you can change their style to reflect how you are feeling. But what happens if none of the clothes you have unlocked represent what you want your character to look like? Well, that’s where clothing customization comes in. This guide will show you how you can create custom clothing in Disney Dreamlight Valley.
How to create custom clothing in Disney Dreamlight Valley
After you create your character, you will enter Dreamlight Valley and meet Merlin. He will have a few tasks for you to complete but doing so will unlock your home. Once you have access to your home, you can start customizing. To do so, start by opening your menu by pressing the X button on Switch, the triangle button on PS4/PS5, and the Y button on Xbox.
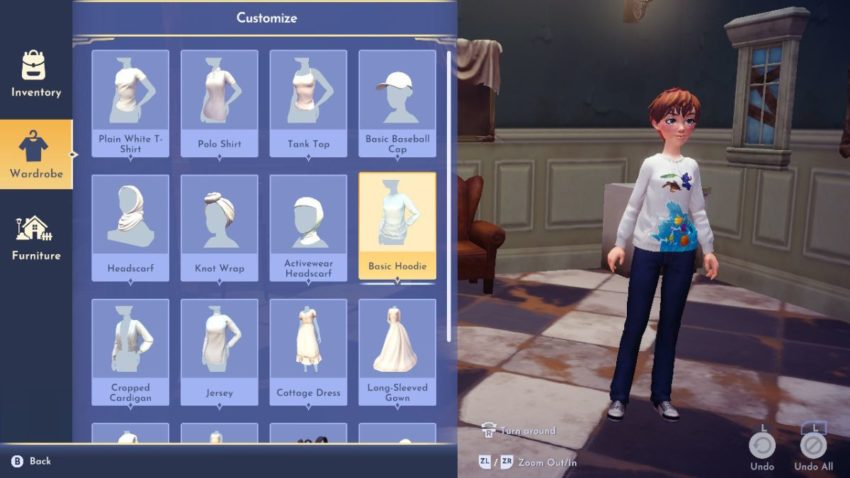
In the menu, go to the wardrobe section. Select the customize option and it will bring you to a new menu. From there, select the option to create a new design. This will open a new menu that shows all of the different clothing options you can work with.
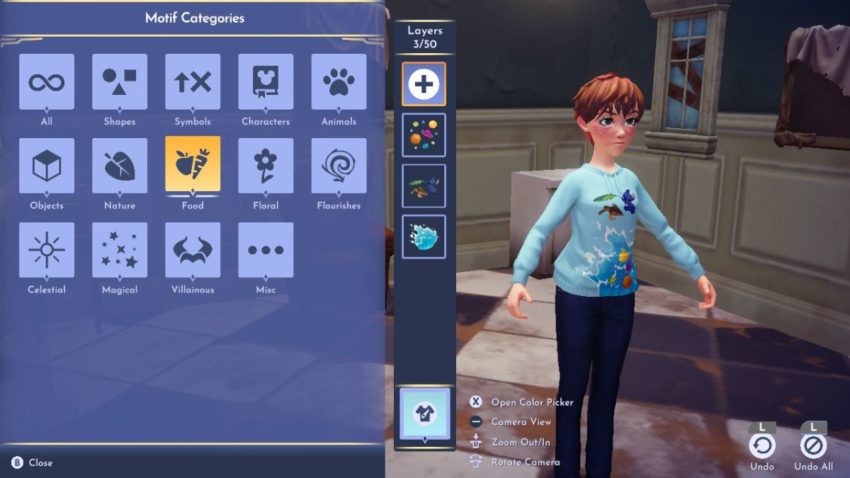
Select which type of clothes you wish to customize and it will place that article of clothing on your character as well as open the customization menu. You will have plenty of options to choose from in this menu. You can interact with the + sign at the top of the menu to bring up different images that you can place on the clothing article you chose.
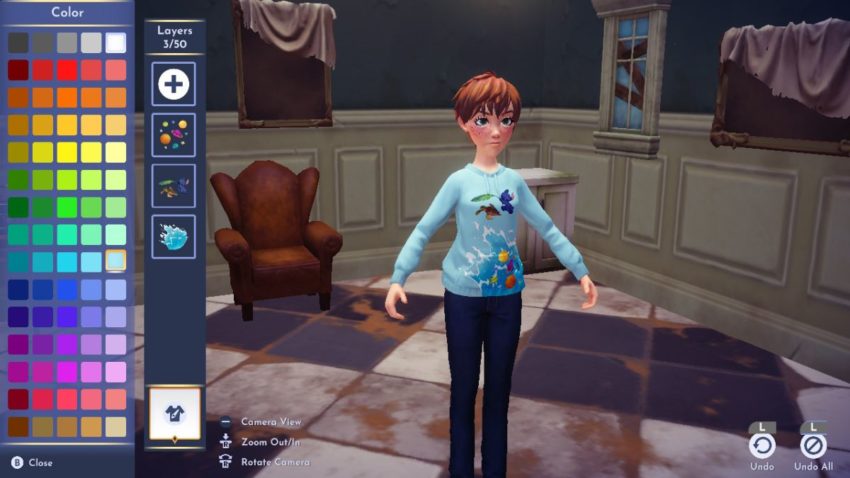
From there, you will have the option to alter the placement of the image, adjust the size, flip the image, and more. You can also interact with the clothing symbol in the bottom right corner of the screen to change the color entire clothing article. Once you are done, back out of the menu and it will automatically save what you created. You can come back and edit it at any time in the future.

Published: Sep 6, 2022 08:20 am