Arguably the most notable feature of Minecraft is its blocky design. The world and all its inhabitants are made of cubes. In fact, that iconic look is one reason why the game stands out so much. That being said, when you are in a Minecraft world, you may want to make a round object. No matter whatever reason you want it for, here is how to make circles in Minecraft.
Related: How to view Minecraft seed maps – Minecraft seed mapper guide
How to build a circle in Minecraft
Before we begin, it is important to point out that since we are working with blocks, you will never make a perfect circle in Minecraft. Instead, we are going to give the illusion of a circle. Note that the smaller area you have to work with, the more angular it will look and the harder it will be to provide it with a rounded look.
To make a circle in Minecraft, first, pick an area with plenty of room for you to experiment with. We have a few ways you can go about making your circles.
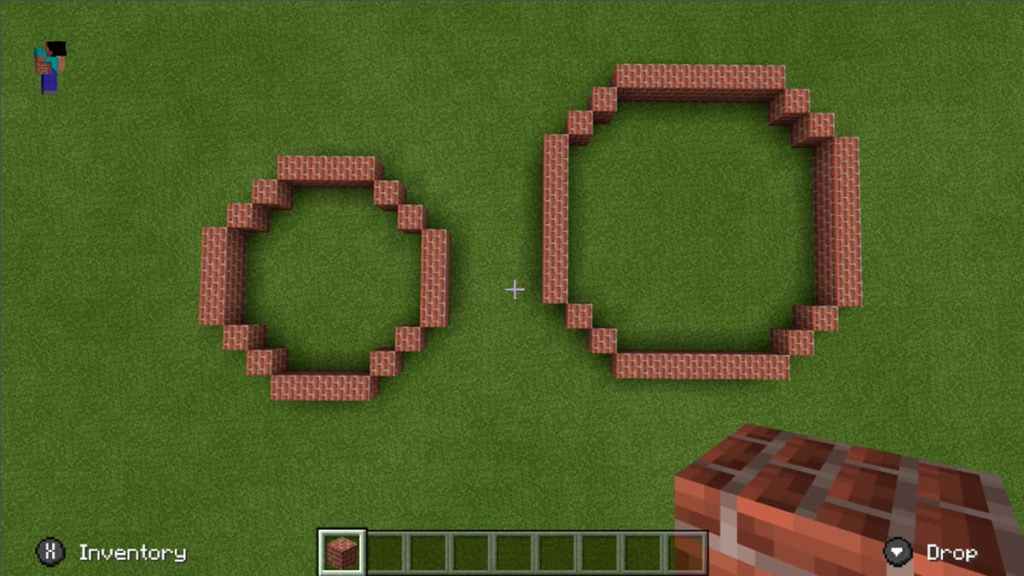
Diagonally lined curves

When you have your spot, first think of how big you want the circle to be. Set a line of blocks in a direction and keep in mind how many you place. When you want to begin the curve, start working your way inward with blocks set diagonally. Again, remember how many blocks you use in this direction. Continue using the same number of blocks to give a circular look to your formation as you go around.
As long as you are using the same number for each line, your circle will look good. Even mixing and matching work well. For the image above, we used two diagonal blocks for both circles, but four straight lines in one, with seven in the other.
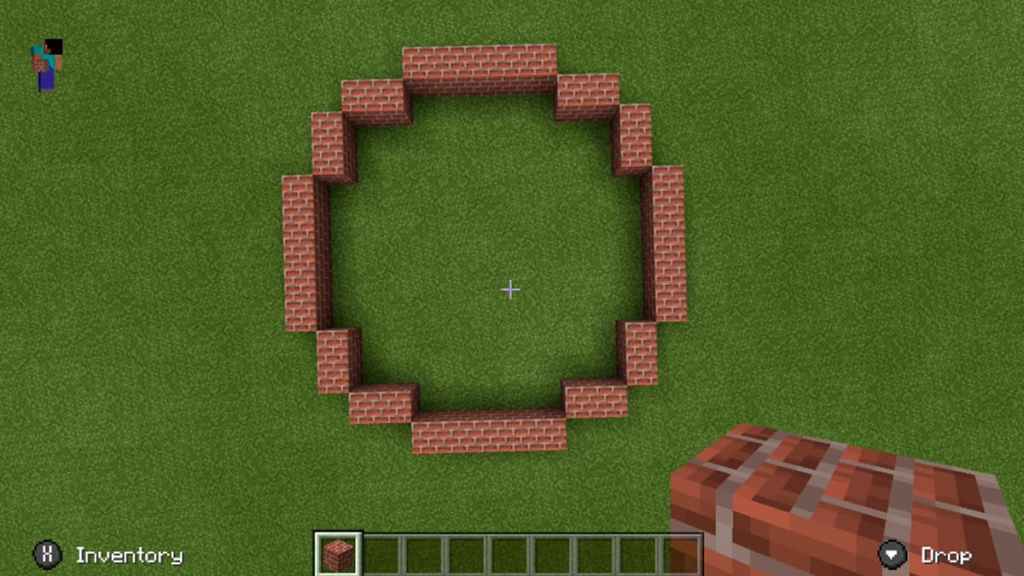
Angular curves

Another useful way to make circles is by using altering lines of blocks in the curves. This will give your circles a more cubicle look but looks great from a distance.
First, set your beginning line of about five blocks. Instead of a line of diagonal blocks, put a short line of blocks in one space to the inside of your circle. We use two or three. Make a right angle with the same number of blocks you just placed at the end of that line. Now fill in the rest of the blocks with the same process.
With our example above, we use two blocks for our right angles, but if you can use more if desired, it just might appear more blocky.
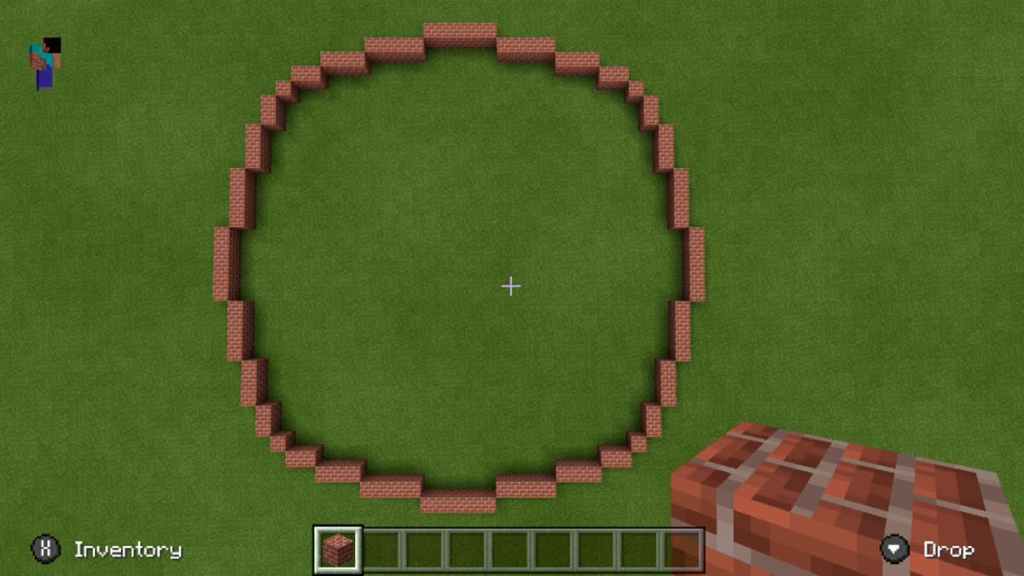
Short lined curves

For this method, you will do a lot of counting up and down as you place blocks. This is better used for larger circles.
First, make a short line of blocks. We like to start with five, but at least use three. Move inside one space and make another line but with one less block. Continue working your way down until you reach one, turn your direction, and begin making the lines again, but now work your way upwards to your beginning number. When you reach the number that you started with, begin working your way down again.
For our example above, we started with a five-block line. When we got to one, we turned and counted back up to five. You don’t have to go to one, but the more lines you put in, your setup will appear more circular.
What is a circle generator for Minecraft?
For any of the above methods, be sure to experiment around to see what you like best. Remember, you are using straight edges to make curves here, so take your time and practice the above methods to find what you are looking for. If you are trying to make a larger circle, you may need some visual help to see where you should place blocks. In that case, we recommend finding a pixel circle generator online. The one we have linked is simple to use and understand.
Circle generators are just helpful tools to let you figure out how a pixelated (or blocky) circle would need to be constructed to get that circle illusion. You can arrange how big you want it to be and save or print the image so you have physical evidence as you are building it and how it should end up looking when you are done.


Published: Jan 30, 2023 05:03 pm