If you’re a streamer, there are plenty of reasons you might want to save a stream you’ve finished. Maybe you had a particularly good night in a competitive game and want to save for future bragging rights, or you’re streaming a full playthrough of a game live but also want to upload these sessions to your YouTube channel. Saving a VOD (Video on Demand) from Twitch is a super simple process, so let’s go over how to do it.
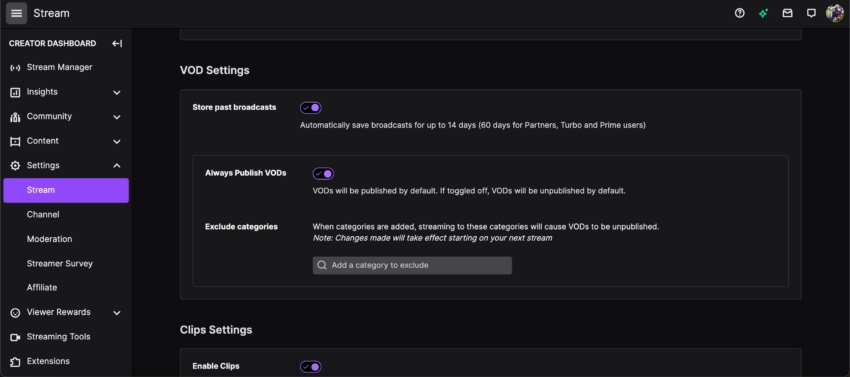
First, you need to make sure your channel is capable of recording a completed stream as a VOD. Click on your profile when logged in and go to your Creator Dashboard. Open the Stream menu that’s found under Settings. Scroll down until you see VOD Settings and toggle on the “Store Past Broadcasts” option. This enables your streams to be achieved as VODs.
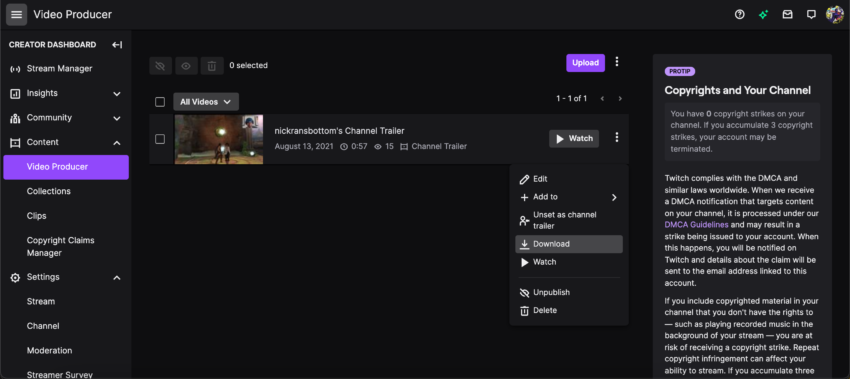
Now that you’ve confirmed VOD is enabled on your channel, open the Video Producer menu that can be found under the Content option in your Creator Dashboard. Next to your video will be a vertical line of three dots. Click on it, and you’ll be given the option to download the video straight to your computer.
Related: Is Twitch down? Here’s how to check Twitch server status
You should download your saved VODs as quickly as possible because they’ll eventually disappear. If you’re a Twitch Partner, Twitch Prime, or Twitch Turbo user, your VODs will be saved for up to 60 days. If you’re a regular user, your VODs will only be saved for 14 days.




Published: Dec 15, 2021 02:09 pm