There will come a time for most gamers when port tweaking will need to be done. This most commonly is done for game hosts, like if someone wanted to make a dedicated server for Ark: Survival Evolved for their friends to play on, but it can also be required for playing cooperative titles or even just checking your emails. Learning how to forward ports is a crucial step in becoming familiar with how you can connect to outside services. However, caution is also necessary — wanton opening, or forwarding, of ports, can be risky. Here’s what Port Forwarding is and how to do it.
Related: How to fix Steam slow disk usage issues
What is Port Forwarding?
Internet ports are best-considered doors for traffic to and from your router (or house, for this analogy) into the internet at large. Some titles and applications are hard-coded to use specific doors from your house, such as the garage door or back door. Forwarding or opening a port is telling the house that it’s acceptable for applications to use these doors. Like with any house, keeping all of your doors open — while it may be easier to use a wide array of applications — is a bad idea, as you may end up with wild animals, weird smells, and even intruders creeping through these doors when you aren’t looking.
This shouldn’t be taken as Port Forwarding itself being dangerous, just that you should have a solid intent in mind while Port Forwarding. Once the application is no longer useful, remembering to close the associated ports can go a long way toward ensuring cybersecurity.
Finally, it should be noted that two applications cannot use the same port simultaneously — the doors are only large enough to send and receive traffic from a singular application. Some applications and games have hard-coded ports, while others can accept many ports. Keep a list of all used ports and by what application, and read through developer-provided manuals and wikis to know what ports to use.
How to Port Forward
Regardless of what router you have, opening or forwarding ports follow the same process. The only thing you’ll need to do on your own is logging in to your own router. The steps for Port Forwarding are:
- Determine what port needs forwarding.
- Log into your router.
- Enter the range in your router.
- Save the opened port.
- If needed, open the inbound Port in Windows Defender Firewall.
Related: How to fix the Steam disk write error
How to log into your Router
Many people have routers that are rented from their ISPs, while others have purchased unique routers. Regardless, reaching your router is universal.

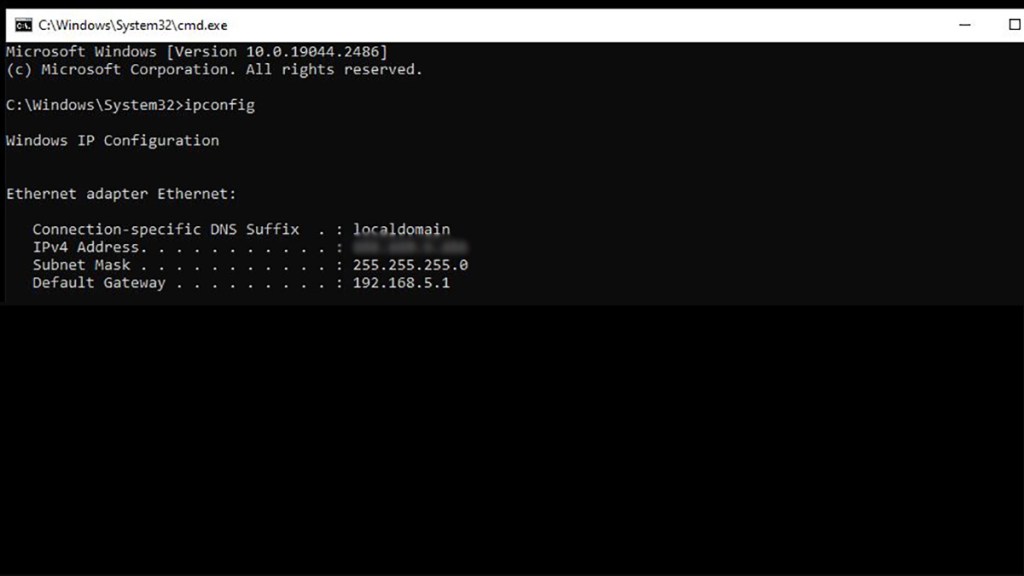
- Enter the Command Prompt by using Windows key and typing ‘cmd‘
- From the Command Prompt, type in ‘ipconfig’
- Find the ‘Default Gateway‘ IP, and enter that into your preferred browser.
- The most common Default Gateway is 192.168.1.1
- Log in to your Router
- If you own your own Router, this should be changed immediately. Otherwise, you’ll need to reach out to your ISP to obtain the username and password.
How to find your Port Forwarding rules in your Router
Here be dragons: each Router has its own user interface, so users should get used to the features and functions that their specific Router offers. Some Router UIs may have the Port Forwarding immediately apparent upon logging in, and for others, you’ll have to dig around. Try using your preferred search engine to find the Port Forwarding settings, such as ‘UniFi Port Forwarding location’, to start moving in the right direction.

For the UniFi network, Port Forwarding can be found within Firewall & Security. Users will want to create a new port forwarding rule. Make sure to give it a related name to ensure the organization of your network, and note that your Port and Forward Port is almost always going to be the same. For Protocol, you can select TCP, UDP, or both. Applications will typically inform users which they’ll use, but it’s reasonable to choose both if you’re unsure or if it’s otherwise unlisted. Save the new rule, and the specified ports will now be forwarded from your Router.


Published: Jan 24, 2023 04:41 pm