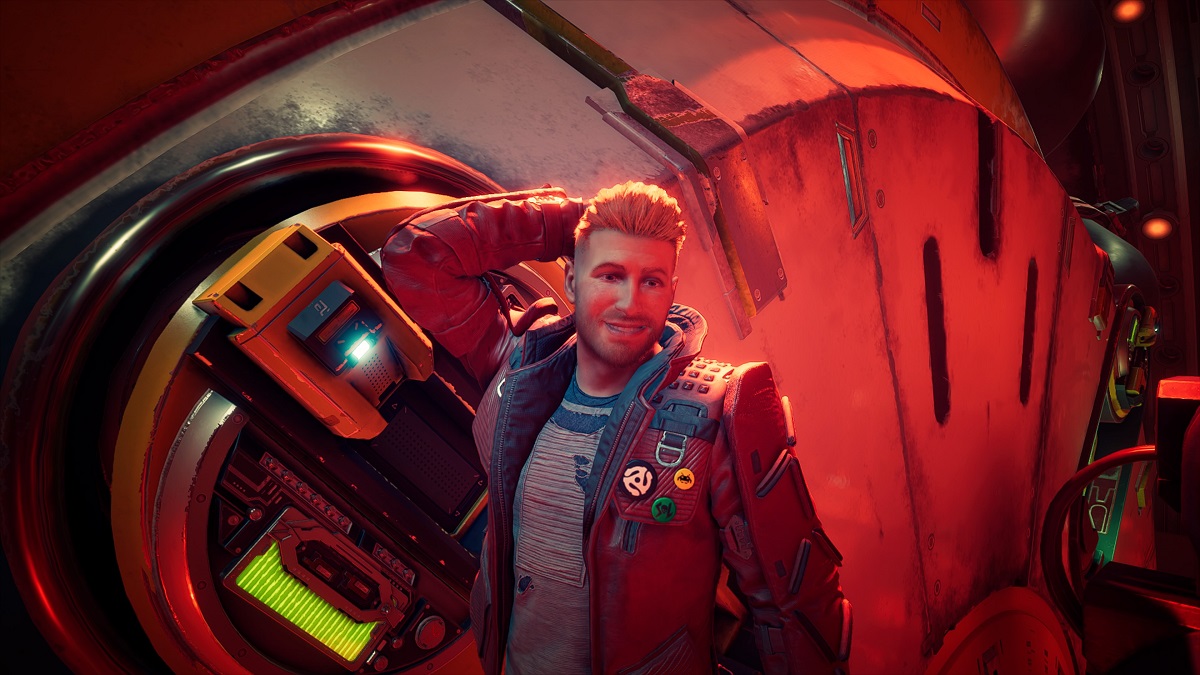
Photo modes are a blessing as more and more games are supporting this beloved feature; Marvel’s Guardians of the Galaxy is one of them. If you think a particularly stunning area is worth a snap, you can do so in the game. Here’s how.
To gain access to the photo mode, make sure you’ve downloaded the 1.03 patch that was released on the first day of the game’s release. After installing it, the photo mode will be available to use.
Once you’re in the game and want to snap a picture, go to the main menu by pressing options, view, or the + button, depending on which console you use. Now, toggle down to “Photo Mode,” just above “Difficulty” and below “Load Game.”
Now that you’re in photo mode, let’s teach you the basics. The left stick moves your camera and the right stick rotates the shot. The left and right trigger buttons move vertically down and up. If you want to go back to the original shot that the photo mode left you at from the beginning, press the triangle button (Y on Xbox and X on the Nintendo Switch).
If you want to focus the camera on a particular Guardian, change the “Camera Type” to Orbit and then select the character you want in the option below. At some points of the game, you won’t be able to switch if they’re too far away from Starlord. You also can’t move the camera or orbit on a specific Guardian during cutscenes.
Once you have the angle you want to shoot, press the square button (X on Xbox and Y on the Nintendo Switch). This will remove the UI on the screen, so it can be screenshotted through your device’s share button.
Now, that you’re quite the beginner hotshot at taking pictures, let’s now to move on to the more complicated options this photo mode has to offer.
The roll provides a tilt to the shoot, letting you create unorthodox pictures. Field of View lets you zoom in and zoom out.
Shift to the next part of the photo mode’s options by pressing the right shoulder button. You’ll see the “Characters” menu next. From here, you can alter the expressions and poses of the characters like a toy. You can create dynamic shots with this. For example, Pose 9 holds Starlord’s blaster out towards the camera. This alongside an angry expression creates a powerful scene to capture. You can also set the character to look straight at the camera if you would like.

The next feature is “Depth of Field.” This will allow the camera to focus on specific objects in the game like a weapon or a character. Mess around with the Aperture and the Focal Distance to get the perfect shot. You can also have the game auto-focus on one specific character in the scene.
Next up are the filters in the game. You can enable chromatic aberation, film grain, a radial blur, in addition to VHS and vignette effects. Below each option, you change their intensity.
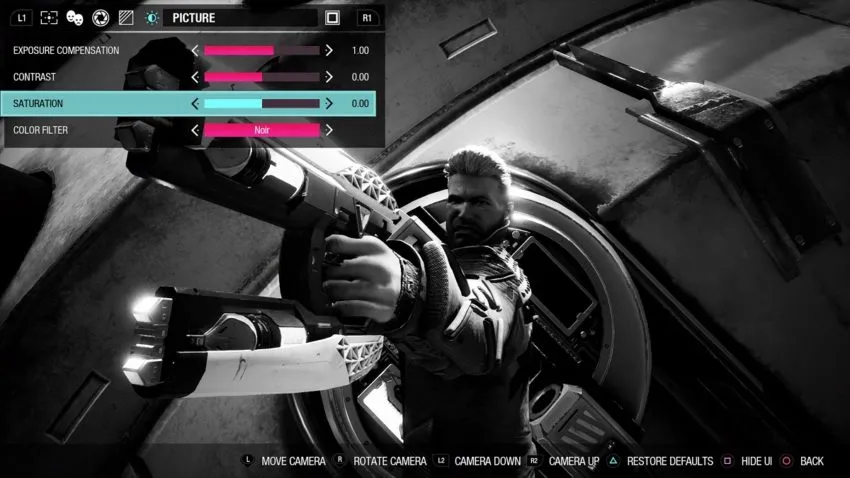
However, if those filters don’t fulfill your needs, you can change the camera’s exposure, contrast saturation, and color filter in the “Picture” menu. For those who are playing Marvel’s Guardians of the Galaxy in HDR, you may want to raise the exposure compensation higher so the image is brighter on social media websites like Twitter and Facebook. If you want a black and white look for this space adventure, the noir color filter will do you nicely.
Lastly, there are some overlays you can add to Starlord. You can set the aspect ratio to 4:3, 9:16, 1:1, 2.39:1, 16:9. For platforms like Instagram or Snapchat, the 9:16 and 1:1 formats will help you. For a more cinematic look, 2.39:1 does the trick. In addition to the aspect ratio, you can also alter the frame. There are 33 different frames you can use. There are some that even look like a comic book, allowing you to make your dream cover art.


Published: Oct 27, 2021 03:40 pm