Nintendo Switch has parental controls that ensure that your kids don’t play grown-up games or buy anything without their permission. This Guide will help you set up Parental Control on Nintendo Switch And smartphone.
All gaming platforms, from phones to tablets to consoles have Parental Control systems that let parents lock kids out from the mature content and restrict their access to the device, but none of them do it as well as Nintendo Switch. In this Nintendo Switch guide, we are going to show you how to Set-up Parental Control and what all features and restrictions you can use.
Nintendo Switch Parental Controls Settings
Nintendo Switch Parental Control offers these important features: Daily Limit, Content Restrictions, Social Media Restrictions, Eshop Restrictions, and many others which we have detailed below.
How To Set Up Parental Control
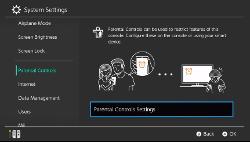
- On your Home Screen select the Gear icon where you will find
- System Settings Menu > Parental Controls
How To Connect Switch With Parental Controls App (Android and iOS)
The Parental Control App isn’t easy to find directly on App Store but worries not – here’s a direct download link for Android (). It is a free app and can be linked to multiple Nintendo Switch.
How To Connect Nintendo Switch With Parental Control App
- Sign in or create a new account if you don’t have one.
- Make sure you have same Nintendo account that in the switch that you wish to control.
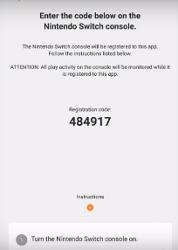
- To link the console to the app enter the registration code sent by the Parental Controls App into the switch console. After you can select user smart device.
Note: Make sure you save the PIN given in the PIN section. You would also need this PIN when you lift the restrictions. This PIN is set by the app when you register.
Parental Control Features
Daily Limit
Set Limits on how long the Nintendo Switch can be used each day. You can Setup time limitations starting at “No Limit” then at 15- minute intervals up to 6 hours. It also shows you what your kid is playing by the user account
When the limited time is up the console will notify your child at the top of the screen, but access to the game or the Switch won’t be affected. Your child will have access to the game and Nintendo Switch, and the alarm will continue to pop up every 15 minutes.
There is a separate option available by which you can restrict access to the game or Nintendo Switch completely once the Daily Time Limit is reached.
Set content restrictions
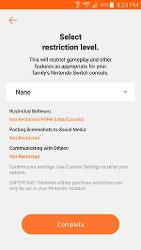
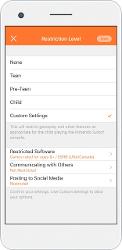
You can set content restrictions types on Nintendo Switch using Parental Control, available options for it are None, Teen, Pre-Teen, Child, and Custom. For the custom option, you can pick age limits from 3+ through 18+.
You can set content restrictions types on Nintendo Switch using Parental Control, available options for it are None, Teen, Pre-Teen, Child, and Custom. For the custom option, you can pick age limits from 3+ through 18+.
Restrictions for posting on Social media
Doesn’t allow your child to use built-in Facebook and Twitter screenshot sharing function.
Set Eshop Restrictions
Restrictions on making eshop purchases vis your Nintendo Account settings.
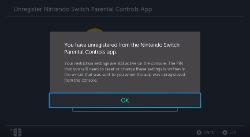
Unregister your Switch from the Nintendo Switch Parental Controls app
- Home Screen > System Settings
- Parental Controls > Unregister App
Decide which Game they can play
Depending on the age of your child you can set up games that are appropriate for the age you select can be played on your system. You can also track all the games that are being played on your Nintendo Switch.
Removing Restrictions
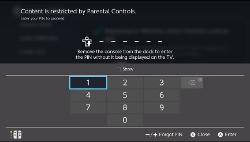
Go to the switch console Home screen and select Parental Controls icon on the top. Enter the PIN that was given to you when you set up the app.
You can see the PIN under the console settings and in the email from Nintendo.
Enter the PIN again when the console is turned on or back from sleep mode after lifting restrictions.
That’s how you set up a parental lock on your Nintendo Switch and on your Andriod or IOS device.





Published: Jul 30, 2018 01:50 pm